
Blog
5 Tips for Starting in Watercolor
by Anne Kostecki

It's here: my 5 tips for starting out in watercolor! I am most well-known as a watercolor painter, and it is the medium I have practiced the most for the last 20 years. Even though most would consider me an expert in this medium, I still consider myself an expert in nothing: because I think that there is always more to be learned, explored, or discovered. If you are wanting to explore watercolor, this is the quick guide for you!
Some of the photography in the post is by Kate Walters, who is very talented! Go check her out.
 1. Gather ye supplies as ye may.
First, you'll need the right supplies. You can purchase supplies at all price points, and the choices may seem overwhelming. How many different kinds of paper are there? What is GSM? How can a single paintbrush cost over $300?
The most essential things you will need are: watercolor paper, paintbrushes, paint, a water cup, and paper towels. As with many things, you get what you pay for with supplies. I understand that art supplies are a luxury, and not everyone can afford the great brands, and even I rarely splurge on art supplies. I am going to recommend things at various price points for you.

Watercolor Paper
In my opinion, paper is where you should splurge. There is an ocean of difference between cheap paper, decent paper, and amazing paper. You will notice immediately the difference between cheaper and more expensive paper. The way the water absorbs, the way the paint moves in the dampened areas, the way everything dries, is very different on various papers. If you can, I encourage you to buy two different types of papers in the beginning, and test various painting methods on both. Make notes on the paper and how it behaves.
Watercolor paper is made from a mixture of water and cellulose fibers (often cotton). A lot of more expensive papers are 100% cotton and can withstand a lot of rough techniques. Paper comes in various weights, often written as "140 lb," etc. Paper weight is determined by two different methods: (1) measuring a ream of 500 sheets (22” x 30”) in pounds (lbs) or (2) by measuring a single sheet in grams per square meter (gsm or g/m2). Light paper is anything less than 140 lb/300 gsm and heavy is 300-400 lb/600-850 gsm.
Paper also comes in various textures: hot-pressed, cold-pressed, and rough. Hot-pressed is smooth, with little tooth, but requires a deft hand (I do not recommend starting with this texture). Cold-pressed has more tooth, can absorb more water, and is a good starting paper. Rough is just as it sounds, can absorb a ton of water, and is good for heavier washes. If you want to try it, go for it!
Watercolor paper comes in a variety of forms (paper pads, rolls, sheets, blocks, and boards) but I recommend just getting a regular pad to start. Here are some good brands:
- Legion Stonehenge Aqua Watercolor Sheets
- Arches Bright White Watercolor Paper
- Fabriano Artistico Traditional White Watercolor Paper
- Fabriano Studio Watercolor Paper
- Canson Montval Watercolor paper

Paintbrushes
Watercolor paintbrushes come in a variety of sizes and shapes, but I recommend for beginners to just buy the round (most versatile) and flat (for washes) brushes. The parts of the brush are: the tip, the belly (the back of the brush where the water is held) the ferrule (the metal attaching the bristles to the handle) and the handle. Bristles can be made with real or synthetic hair; with real hair coming from different kinds of animals (squirrel, sable, mink, and a lot more).
I would get at least 3-5 brushes, in different sizes like 2, 6, 8, 10, etc. I would not buy a brush set, because they often include unnecessary brushes. Just hand select 3-5, mostly round, with one flat brush size. Here are some brushes I recommend:
- Winsor & Newton Cotman Watercolor Brushes
- Princeton Aqua Elite Series 4850 Synthetic Brushes
- Escoda Reserva Kolinsky-Tajmyr Sable Brushes and Sets (fanciest ones, very high quality!)

Paint
There are so many kinds of watercolor paint, and honestly, I will be writing a separate blog post about all of mechanics behind paint. I learned watercolor using a specific brand, Winsor & Newton, and that's what I recommend for beginners, even though it's not "student grade," but a "professional grade." I also recommend Viviva Colors pan set, which is perfect for beginners (plus it is sustainable, biodegradable, and handmade).
You can buy watercolors in pans or in tubes (and squeeze out onto your palette). I would buy a pan set, and if you like them, then get tubes in these colors:
- Yellow Ochre
- Alizarin Crimson
- Cadmium Red Light
- Cadmium Yellow Light
- Sap Green
- Ultramarine Blue
- Phthalo Blue or Prussian Blue
- Permanent Rose
- Raw or Burnt Umber
- Raw or Burnt Sienna
- Payne's Gray
You can mix almost any color from these. Don't buy white, the whitest you'll get in watercolor is your paper color.

Water Cup & Paper Towels
This should be self-explanatory, although I will recommend getting a glass, square vase as a water cup, and here's why: it's virtually impossible to spill, and you'll never mistake it for your drinking cup!
 2. Use at least 1 sheet of paper just to explore your new supplies.
I think it's very helpful for new students to take one or more sheets of paper and just goof off for the first time, testing out water and colors and how the brushes behave. You may find that you are using too much water, or not enough, and that's when you'll start using the paper towel. Your brush should not drip with water, but it should be damp to the touch. Watercolor is very easy to clean, so don't worry about getting it on furniture, clothing, hands, etc.
Try using a clean brush, wet it, and paint a design on the paper. You can even use the brush to dabble more water on top of the design, so that the water "stays" within the lines you've painted. Now add paint to your brush. Dab the paint into the bubbled-up wet areas, and watch how the paint bleeds. Have fun playing around and seeing how the paint looks on the paper.

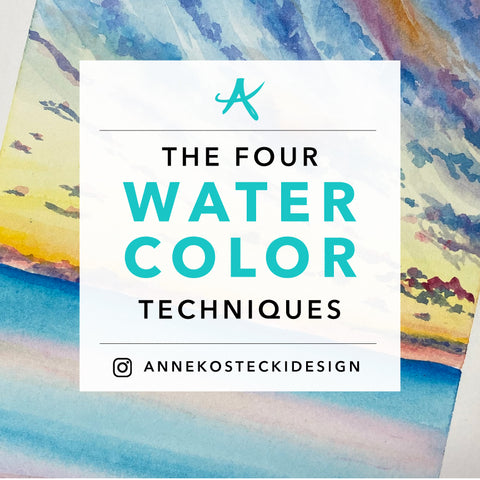
3. Follow a tutorial step-by-step.
This is not just a shameless plug for my YouTube channel (which I don't update often enough)! Go to your local library, get a watercolor book and open it up. Or go online and find a video tutorial, there are thousands of them to choose from. I do have a few very easy tutorials on my YouTube channel, so feel free to check them out!
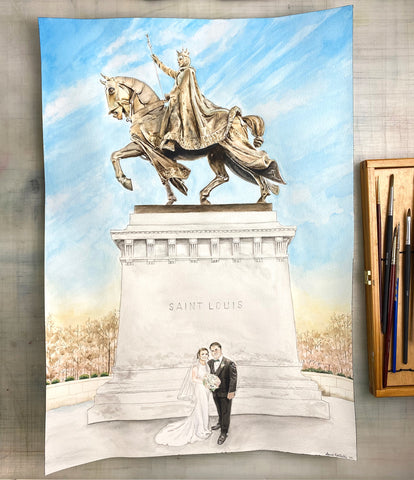
I recommend starting simple, like flowers, a beach, or even just shapes. Watercolor requires some patience, so you may have to wait for the paper to dry in between steps. Here's a secret: if you're impatient, then you can use a hair dryer in between steps to speed up drying time.
Want to paint misty trees like the ones above? Here is a link to my tutorial to show you how!
 4. Dedicate a spot for painting, and leave your supplies ready to go.
One of the biggest complaints I hear from budding artists is that they often lose the creative "spark" as soon as they set up all their supplies and then concern themselves with cleaning it all up. The easiest solution for this is to dedicate a spot, no matter how small, to art. Luckily, watercolor is one of the least messy art mediums (compared to oil, acrylic, or pastel drawing, it definitely is).
Watercolor palettes can sit out in the open air indefinitely, and all you need to do is re-wet the paint to activate it again. I always make sure to have a table with my paints, brushes, water cup, a roll of paper towels, a stack of paper, reference photos, and any other necessary supplies near or on it. If you're a neat freak like me, then a table stacked with art supplies and wadded-up paper towels sounds unpleasant, but for me, it's necessary.
The easier you make art for yourself, the more you will do it.

5. Work from light to dark!
Look at your sketch, reference image, or painting subject. Identify the lightest part of it. Visually scan the subject and break down those light parts into shapes. It might help to sketch out those areas.
Helpful tip: yellow is often the lightest color you will use (especially when painting from life). If I am doing a landscape with sunlight, I will paint around the white areas, and start with very pale, watered-down yellows.
I say it's safer to paint something too lightly in watercolor rather than too dark. It's much easier to add another layer to darken than to lift up a layer to lighten; both because of the effort involved and because you can damage the paper by lifting and scrubbing too much.
After you've visually marked out your lightest areas, then move on to the next lightest area, and so on. As you're working, you may notice you need to add more washes here and there, and that's ok! This medium requires patience, and it will take some time to get used to it.

So there you have it! I hope these tips were helpful. I will be doing a more in-depth intro post to watercolor with even more tips and techniques, so be sure to sign up for my newsletter to hear about my updates first thing.


1 comment
Thank you for explaining that you should explore all of your new supplies. I’ve been wondering what I should do now that I have everything to start watercolor painting. I’ll be sure to try this out, especially so I can try out some of the colors. https://birgitoconnor.com/free-courses-1